How To Create An Image Gallery In Blogger
June 06, 2020
If you are like me who is starting out with a blogger account and knows very little about html/css to get your blog to where you want it to be, it can be very frustrating and time-consuming trying to figure out even the simplest coding. So a couple years back I was trying to set up a gallery for a post, but it was taking me forever to do so. Then I came across this code that made it a little bit easier to get my gallery looking uniformed in rows and columns. But now that Blogger has added a new interface I have found a new way that you can get a gallery in your posts.
- First you will click the table button in the upper right hand corner on your blogger page see image below
- Next choose insert table from the drop down

- By default a four(4) column two(2) row table will be inserted you can add or delete rows and colums from the drop down. I wanted three(3) columns so I placed my cursor within the column I wanted to delete clicked the table icon and then selected delete column.

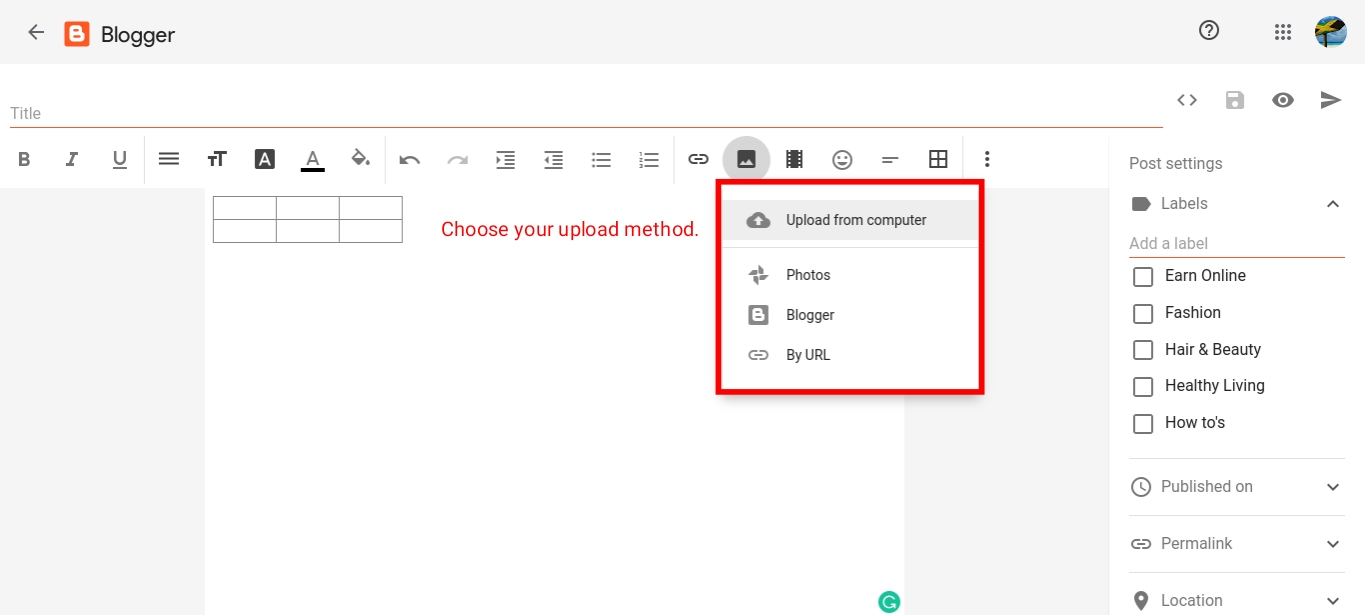
- Next place your cursor in the box you wish to add the image, then click the add image icon.

- Choose the method which you would like to use to upload your image from the drop down.
- Now click on the image which you inserted and a menu box should appear click on the pencil icon to change the size of the image.
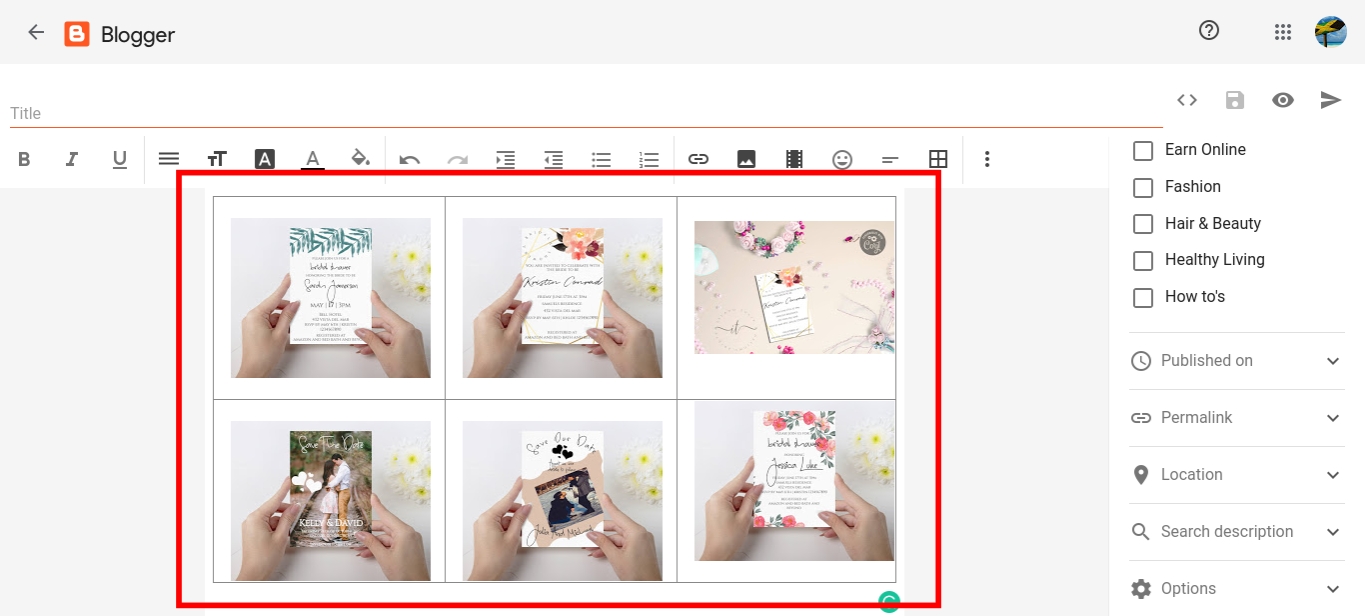
- Now your gallery should look like the image below, you will notice that there is still a border around the images.
- To remove the borders you need to switch to html mode you can do this by clicking the button as shown below.
- Next you will search for "border" and "width" which located at the very beginning of the code. Change both numbers to zero(0).
This will remove the borders and give you a nice image gallery to showcase your images on your blogger account.
I hope that this step by step tutorial was helpful happy blogging.
Pin me


0 comments
Let me know your thoughts, leave a comment below.